How Is a Ceiling Fan Installed?
Whether you just like the feeling of a breeze or you’re hoping to help reduce your energy bills throughout the year, a ceiling fan is a great way to do it. A fan can even upgrade the overall look and functionality of your home. However, it’s imperative that your new fan be installed correctly, or it could lead to ineffectiveness and even danger for your family.
Picking Out the Ideal Fan
It’s imperative to pick a ceiling fan that is designed for the space that you have. It should be rated to handle the square footage of your room. A fan that is rated for rooms bigger than yours will tend to overpower the room and look visually out of place. Contrarily, a fan that is too small for your space won’t circulate the air properly. Generally, the bigger your roof, the bigger your ceiling fan blades will need to be.
Apart from the size of the fan, you also need to consider any height limitations. It’s typically recommended that there be a minimum of seven feet of space between the floor and the fan blades. If you have taller rooms, you can install the fan even higher, at eight to nine feet, for more efficient operation. If you have low ceilings, you may need to invest in a low-profile fan. These are designed with a lower drop-down to help accommodate vertically-challenged rooms.
Determining the Perfect Location
A ceiling fan should be installed in the center of a room for optimal results. In rare cases, you may need to have more than one fan installed to cover a very large room. An electrician can help you to determine if you need more than one fan per room. In general, rooms that are bigger than 20 feet by 15 feet will require more than one fan. In these bigger rooms, you’ll find that having multiple moderate-sized fans provides more of a breeze than one big fan.
In some cases, you may already have an existing ceiling fan or a light in the location where you want your new fan to go. Your electrician will need to evaluate the existing electrical box to ensure that it’s fan-rated. This simply means that it can be used to hold up a heavy ceiling fan. If your current box isn’t fan-rated, it will need to be upgraded with one that is.
If you’re going to have your new ceiling fan installed in a location where there is no existing fan or light, your electrician will need to properly evaluate the site. They will need to look for where your joists are and if there is any plumbing or HVAC infrastructure in the way. Once an ideal location is chosen that is free from obstructions and able to support the electrical box, your electrician will install a new fan-rated electrical box.
Prepping Your Wiring
Most ceiling fans do come with a remote or some sort of pull-string system that allows you to switch between fan power levels and its light. However, if you want to be able to control your fan via the light switch on your wall, it will need to be wired correctly for the fan.
In some cases, you may desire to have a dual switch. This will allow one switch to control the lights while the other controls the fan. Either way, all of the wiring to your existing or new electrical box must be properly prepared before the actual installation process starts.
Getting the Process Started
Once the lightbox and wiring are all prepped, it’s time for the actual installation process. Your electrician will start by turning off the power to the circuit that your new ceiling fan will be on. This protects your electrician from coming into contact with any live wires while working on installing your new ceiling fan.
Next, they’ll secure the mounting bracket to your existing fan-rated electrical box. This is done via two screws. The main wires will be threaded through the center of the mounting bracket so that they’re available for when your electrician needs to wire up your new ceiling fan.
Downrod Installation
Most ceiling fans are designed with a downrod that runs from the electrical box in the ceiling down to where the actual motor housing is for the fan. This helps to create the necessary space between the ceiling and your fan blades. It also serves as a housing for the electrical wires for your new fan controls.
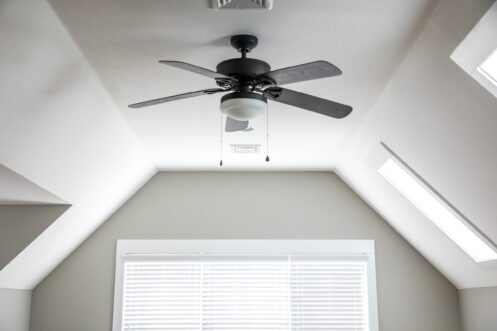
There are varying types of downrods available depending on the installation environment that you’re using. If you have a flat ceiling, then your electrician will use the straight downrod that comes along with your ceiling fan kit. However, if you want your ceiling fan installed on a sloped ceiling, then your electrician will need to purchase a separate downrod that is specifically designed to maneuver on a slope.
Wiring
Once the downrod is properly installed, it’s time to install the fan wiring. The wiring will be connected directly to the fan motor housing. Some fans are designed with a hook on their mounting bracket to make it easier to hold the motor housing. In other cases, your electrician may need a second set of hands to hold the motor housing while they do the wiring.
When you first see all the wires that come inside the fan’s housing, it can be overwhelming. It’s important to note that not all wires may need to be used. Fans are constructed with wiring to fit various types of installations. Your electrician will be sure to diligently connect all the necessary wiring to have the controls you want from your new ceiling fan. Once all the wiring is complete, they’ll attach the fan canopy or motor housing to the downrod or mounting bracket, depending on the specific type of setup you have done.
Blade Attachment
Next, your electrician will screw together all of the fan blades to their respective brackets in preparation for attachment to your fan’s housing. Each blade bracket will then be screwed into the motor housing snuggly. If your ceiling fan has a light bulb in it, your electrician will screw that in and cover it with the included globe.
Testing Out Your New Fan
Once the fan is completely installed, your electrician will turn the power back onto the circuit that your ceiling fan is on. They will test all the different functions of the fan to ensure that it has been installed correctly and that everything works as it should.
Excellent Electrician Services
Black Lion Heating & Air Conditioning offers excellent electrician services for Kirkland, WA and surrounding communities. We can also assist with all of your heating, cooling, water heater, heat pump, ductless AC, indoor air quality, gas fireplace, and duct cleaning needs. Simply contact us today to schedule your next service appointment.